
How to Add Photos to Your Menu (incl. AI Photos)
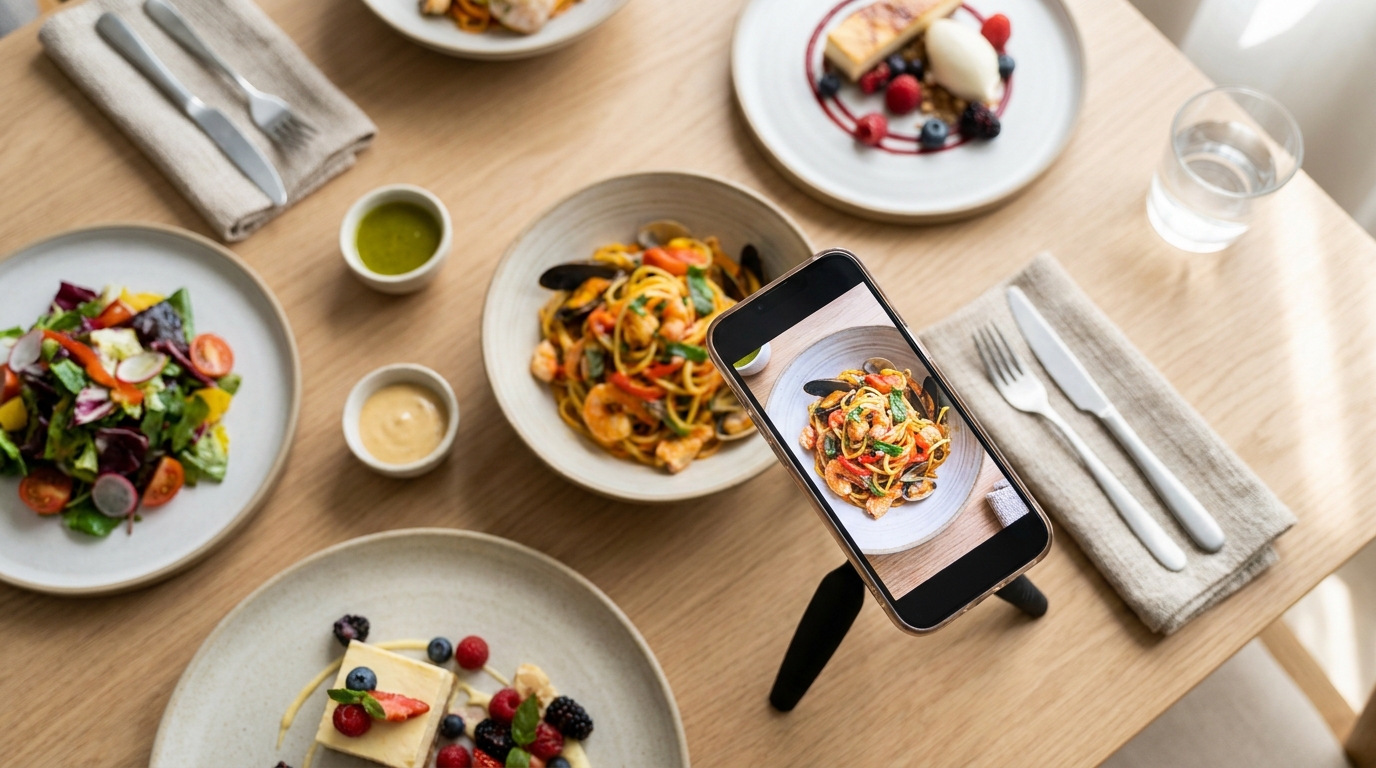
A photo is the strongest thing you can put on a menu item — it lifts orders of that dish, and the effect is biggest on the dishes guests do not recognize. But a menu of mismatched, badly lit snapshots looks worse than no photos at all. Here is which dishes to photograph first, how to keep the set consistent, and how AI-generated photos let you fill in the gaps without booking a shoot.
TL;DR — Key Takeaways
Photos sell. A good image on a dish lifts its orders meaningfully (commonly cited at ~25–30%), most of all on unfamiliar items.
Don't photograph everything at once. Start with signatures, high-margin plates, and dishes with names guests won't recognize.
Consistency beats quantity. Same angle, light, and framing across the set so the menu looks designed, not collaged.
Two ways to get there: shoot real photos, or generate brand-consistent images with AI when a shoot isn't practical.
Mind the basics: upload web-sized images (most platforms cap around 2 MB), and always add descriptive alt text.
Why photos are worth the effort
On a digital menu, a photo does what a server's recommendation does on the floor: it removes doubt. A guest scanning a list of names hesitates on anything unfamiliar and defaults to the safe choice. A clear photo answers "what will this actually look like?" instantly, and that confidence converts — which is why the photographed dish reliably outsells its un-photographed neighbors.
The effect is strongest exactly where you make the most money: signature plates, dishes with regional names a newcomer won't know, and anything where the value isn't obvious from the title. A photo also quietly justifies price — a generous, well-shot plate makes €16 look like a deal in a way the word "burrata" never will.
Step 1 — Decide which dishes to photograph first
You do not need a photo on every line, and trying to do all ninety at once is how the project stalls. Prioritize in this order:
Signatures— the dishes you want to be known for.
High-margin plates— where an extra order matters most to the bottom line.
Unfamiliar names— regional or specialty dishes a first-timer can't picture.
Anything underperforming that you suspect is being skipped because guests don't know what it is.
Simple, self-explanatory items — a cola, a side of bread — can stay text-only. A menu where the right30 dishes have great photos beats one where all 90 have mediocre ones.
Step 2 — Choose your path: shoot or generate
Shoot real photos. If you have the time or a photographer, natural light and a repeatable setup go a long way. Shoot overhead or at a low three-quarter angle, on a consistent surface, at the same time of day for even light. The hard part isn't any single photo — it's making forty of them match.
Generate with AI. When a shoot isn't in the budget or you need to fill gaps fast, AI food photography creates brand-consistent dish images from the item's details at near-zero marginal cost. It is especially useful for getting a complete, uniform set quickly, and for dishes that are awkward to style. The deeper strategy — when AI photos shine, when a real shoot is worth it, and how to keep them honest — is in our AI food photography playbook.
Most menus end up with a mix: real photos of the heroes, AI-generated images to complete the set consistently.
Step 3 — Keep the whole set consistent
This is the rule that separates a professional menu from a scrapbook. Whether you shoot or generate, hold these constant across every image:
Angle— pick overhead or three-quarter and stick to it.
Light— same direction and warmth; avoid harsh flash and color casts.
Framing & crop— the plate filling a similar share of the frame each time.
Background— one surface (warm wood, bright marble) for the whole menu.
When every image follows the same recipe, the category pages look intentional and the food looks like it belongs to one kitchen. Mismatched photos do the opposite — they make even good food look careless.
Step 4 — Get the file details right
A few technical basics keep the menu fast and sharp:
Format & size. Use JPG, PNG, or WebP, and keep files web-sized — many platforms cap uploads at around 2 MB. A large phone photo should be resized down before upload so the page loads quickly on mobile data.
Aspect ratio. Keep crops uniform so the grid looks even; let the platform's framing guide you.
Alt text. Always write a short, descriptive alt for each image ("charcoal-grilled chicken with garlic sauce and flatbread"). It helps accessibility and image SEO, and it is good practice on every photo you add.
Where photos help most
Beyond the menu page, your dish images earn their keep in a few more places: they make your public menu look complete and trustworthy, they feed the social posts and ad creative you make from the same library, and they raise the perceived quality of the whole brand. A guest who sees a polished menu before they have tasted anything already expects more — and orders accordingly. Photos also pair with strong descriptions: the words and the image together close the sale.
A simple, repeatable photo setup
If you are shooting your own, you do not need a studio — you need a setup you can repeat exactly. Here is one that works on a phone:
Pick one spot near a window with soft, indirect daylight. Shoot at the same time of day so the light matches across sessions. Avoid overhead restaurant spotlights and on-camera flash, which flatten food and cast hard shadows.
Use one surface for the whole menu — a warm wood board, a sheet of marble, a neutral linen. Consistency of background is half of what makes a set look professional.
Lock your angle. Overhead works for bowls, flatbreads, and spreads; a low three-quarter angle flatters height like burgers and stacked plates. Choose per dish-type, but keep it consistent within the menu.
Style lightly and honestly. A garnish, a smear of sauce, a prop fork — but the plate should look like what a guest actually receives. Wipe drips off the rim before you shoot.
Fill the frame the same way each time so crops match, then resize the export down for web before uploading.
Batch it: plate five or six dishes back to back in the same setup and you will get a matching set far faster than shooting one here and one there.
Where else your menu photos earn their keep
The library you build for the menu pays off well beyond it. The same images make your public menu and Google listing look complete and trustworthy, they become the raw material for social posts and ad creative, and they raise the perceived quality of the whole brand before a guest has tasted anything. Shoot or generate once, and reuse everywhere — which is part of why a consistent, on-brand set is worth the small upfront effort.
Why food photos work
A photo on a menu does something words cannot: it removes the last sliver of doubt at the moment of decision. Ordering at a new place is a small gamble — the guest is committing money to something they have not seen — and a clear, appetizing image settles that gamble instantly. This is why the lift is biggest on unfamiliar dishes: a guest who would never risk an unknown name will happily order the same dish once they can see it.
Photos also do the job a good server does, which is gently steering attention. A single strong image in a category pulls the eye straight to that dish, so the item you photograph is the item that sells — which is exactly why you photograph your signatures and high-margin plates rather than your cheapest. And images raise the perceived quality of everything around them: a guest who opens a menu of crisp, consistent photos assumes the kitchen is just as careful, and orders with a little more confidence.
How many photos do you really need?
You do not need a photo on every line, and chasing a complete set is how the project stalls at item twenty. A better target is the dishes that actually move the needle: your signatures, your most profitable plates, anything with a name a newcomer cannot picture, and any dish you suspect is skipped out of uncertainty — your menu analytics will tell you which. For many menus that is thirty or forty images, not ninety, and photos are one layer of the complete guide to creating a digital menu.
Simple, self-explanatory items — a cola, a side of bread, a plain espresso — carry their own meaning and can stay text-only without losing a single order. The quality bar matters more than the count: a focused set of consistent, appetizing photos on the right dishes beats a full set of mismatched snapshots on every dish, which actively makes a menu look careless. Start with your top sellers, get them genuinely good, and extend over time.
Common menu-photo mistakes
Mismatched snapshots. Different angles, lighting, and backgrounds make a menu look amateur.
Photographing everything before anything is good. Get the heroes right first; complete the set after.
Uploading giant files. A slow menu loses guests on mobile; resize before upload.
Photos that don't match the plate. An image that oversells the real dish creates a let-down and a complaint.
Skipping alt text. It is quick, helps SEO and accessibility, and there is no reason to leave it blank.
Add menu photos free with Intermenu
Intermenu lets you upload your own dish photos or generate brand-consistent images with AI right where you edit the item — so you can complete a uniform, appetizing photo set without booking a shoot. Add a descriptive alt to each, and your menu looks designed from the first scan.
Build your digital menu free with Intermenu →
Frequently Asked Questions
How do I add photos to my digital menu?
Open the item in your menu dashboard and upload a web-sized image (JPG, PNG, or WebP, usually under ~2 MB), or generate one with the platform's AI photo tool. Add a short, descriptive alt text, save, and it appears on the live menu instantly.
Do menu photos really increase sales?
Yes — a clear photo on a dish reliably lifts its orders, with figures commonly cited around 25–30%, and the effect is strongest on unfamiliar or higher-priced items where guests are uncertain.
Should every menu item have a photo?
No. Prioritize signatures, high-margin dishes, and unfamiliar items. Simple, self-explanatory items like drinks can stay text-only, and a smaller set of consistent photos beats a full set of mismatched ones.
Can I use AI to create food photos for my menu?
Yes. AI food photography generates brand-consistent dish images from the item's details, which is ideal for completing a uniform set quickly or when a shoot isn't practical. Review each one so it honestly represents the plate.
What size should menu photos be?
Web-sized — resize large photos down before upload (many platforms cap around 2 MB) so the menu loads fast on mobile. Keep crops and aspect ratios consistent across the menu for an even grid.